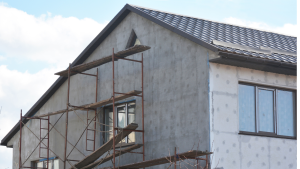
Since your stucco has cracks and holes, you may wonder how to cure them. Read this piece to find out how Mend stucco. You’ll discover how to carry it out on your own at home. Both internal and external walls may be covered with stucco. It provides a fire- and water-resistant barrier. Although stucco is a very durable material, Any cracks or holes should be filled as quickly as possible, which is feasible since stucco is not vulnerable to harm from wear and tear.
The question, “Can I repair the stucco myself?” arises. Fortunately, most homeowners can
repair cracks and holes in stucco by themselves with the proper tools and materials.
REPAIRING STUCCO TYPICALLY INVOLVES VARIOUS STEPS:
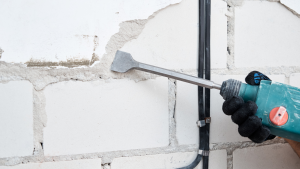
- Remove any loose or damaged plaster by using a chisel and hammer.
- To eliminate any filth, properly clean the area and debris.
- If the damage is modest, you may trowel on a small batch of stucco that the manufacturer’s instructions have mixed.
- If the repair is more substantial, you may need to create a form out of metal or wood to confine the stucco while it cures.
- Float or trowel the stucco’s surface to make it smooth.
- Allow the stucco to cure by the manufacturer’s instructions. This often takes a few days or longer.
- As soon as the stucco has cured, you may paint it or finish it as you choose.
- It’s crucial to follow the manufacturer’s directions and use the appropriate equipment and materials to make sure the work is done right and will last. If you are worried about your skills to
- Repair stucco, and consult with a local professional. Stucco repair near me.
Any damage must be repaired regularly to increase the stucco façade’s longevity. Follow these instructions to fix and seal stucco cracks and gaps.
THINGS YOU WILL NEED FOR EXTERIOR STUCCO REPAIR:
- Wire brush
- Hammer
- Chisel
- Gloves
- Safety glasses
- Trowel
- Sponge
- Stucco mix
Let’s move on to the methods for repairing stucco on the outside.
5 STEPS TO REPAIR STUCCO AT HOME
STEP 1: CLEAN THE AREA
Clear the crumbling stucco and use a brush or shop vacuum to clear any dust from the holes or cracks before beginning the exterior stucco restoration procedure. Remove any loose plaster pieces by using a hammer or hammer and chisel.
Take care not to damage the lath underneath it as well. Start the restoration when the stucco has completely cured. You can apply new coats more quickly now that this has been done.
It will help if you put on safety glasses for this step to avoid harm because it’s possible for dust to enter your eyes when you’re removing the damaged plaster. It is suggested first to get protection for this reason.
STEP 2: PREPARE THE REPAIR AREA
For a successful repair, the area must be ready. With a putty knife, widen small fractures and create a V-shape. The repair material will stick to the stucco more readily as a result.
Use a reciprocating or circular saw to cut a square or rectangle around the larger holes if it is more extensive. This will provide a clean, straight edge for the repair material to cling to.
STEP 3: MIXING THE REPAIR MATERIAL
Stucco repair options are many for repairing gaps and cracks. The most typical of them all is the stucco patch. To use, only mix the powder and water according to the package instructions. For substantial repairs, it could be necessary to use pre-mixed stucco repair mortar or a classic combination of Portland cement, sand, and water.
STEP 4: APPLY THE REPAIR MATERIAL
Mix the repair material with a trowel or putty knife before applying it to the crack or hole. After filling up all the tiny fissures, the surface should be leveled using a trowel. For larger holes, many layers of repair material must be applied, each of which must completely cure before being followed by another. Follow the manufacturer’s recommendations for drying and curing timeframes.
STEP 5: FINISH THE REPAIR
After the material has completely dried and set, the repair is completed. Before integrating the repair material with the surrounding plaster, use a sanding block to smooth the region where minute fractures occur. Add a layer of stucco finish to make bigger holes resemble the surrounding wall. After preparing it by the box’s directions, apply a stucco finish batch to the damaged area using a trowel or brush.
Observe the drying and curing guidelines provided by the manufacturer. You must paint the repaired area if it still needs to to make it match the surrounding stucco. This yields a more uniform surface and guarantees that the paint will adhere to the stucco.
Apply a coat of exterior paint using a brush or paint once the priming has dried. Bring a stucco sample to the shop if you need clarification on the color so they can match it.
Stucco repair questions are often asked. Can I repair the stucco on my own? This comprehensive material likely covers all topics, including “How to fix cracks and holes in stucco?” You may need help to mend the stucco yourself since outdoor stucco repair calls for expert help.
Conclusion
Stucco is susceptible to damage due to frequent weather changes like rain, snow, or extreme sunlight. When there is insufficient weatherproof protection, cracks form fast. More damage might be caused by cracks, which would raise your costs and cause other problems. A house’s structural integrity is maintained by repairing defects and fractures in the stucco. The home’s value increases after stucco upkeep when listed for sale.


